
Even the smallest details play a role in a roof's effectiveness and integrity. Shingles and flashing are among the most noticeable roofing materials, but roof nails often get overlooked—despite being just as important as more obvious elements. And since they can greatly differ in size, material, and length, using the wrong nails to secure certain areas can cause all kinds of problems down the road.
Types of Roofing Nails
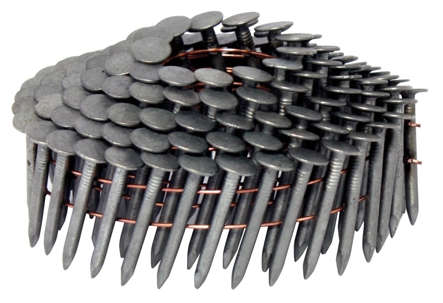
When nailing shingles, roofers mostly choose from among these four common types of roofing nail:
Typical roofing and ring-shank nails are the most commonly used. Typical roofing nails may have a smooth or circular unconnected rings around the body to help them maintain grip in the deck. Ring shank nails have connected rings around the shaft which give them superior withdrawal resistance during high winds. Either nail will keep shingles securely attached to the roof when installed according to the manufacturer's instructions. That said, ring shank nails have superior withdrawal resistance—which is why they're typically used in high-wind areas and are often required by local codes. Both of these nail types also offer strength and the ability to penetrate the deck below with ease.
Square and round cap nails are more commonly used for roof underlayment than shingles. The larger caps provide holding power that keeps the underlayment material in place using fewer nails.
Types of Roofing Nail Materials
What the nail is made of is often just as important as the type of nail:
Galvanized steel: While less corrosion-resistant than stainless steel, these nails are popular as they still have strong corrosion- and rust-resistance (courtesy of their zinc coating) but cost much less than stainless steel. There are two main types: hot-dipped galvanized and electro-galvanized. Electro-galvanized combines electricity with a less powerful chemical solution to create a thinner zinc coating. Some contractors will opt for this grade of nails to save costs, but this comes with a hefty risk for you as the homeowner due to how quickly they rust in our environment. Hot-dipped is more robust, since the nail is immersed in a melted zinc solution, which creates a strong coating. In certain areas of the Coastal Bend, for example, hot-dipped galvanized nails are required per Windstorm installation guidelines, and these are the only nails we use here at Lighthouse Roofing.
Copper roofing nails are resistant to corrosion and can last much longer than steel. However, they're typically a more expensive option. Copper is more often used when installing long-lasting roofing materials like tile and clay. If you use copper flashing for the roof, it's best practice to use the same material for the nails. However, steel nails are acceptable, though mixing galvanized nails with copper can cause a galvanic reaction that leads to some corrosion in both.
Stainless steel nails are typically only used in environments very likely to cause corrosion, most commonly in coastal regions.
Aluminum nails are not as commonly used, especially in coastal areas since salt spray can damage the nail and may cause it to deteriorate prematurely.
Nails for Roof Underlayment, Flashing, and Sheathing
Different roof components call for different nails. For underlayment, use square cap nails for felt and round head for synthetics (both nail types come with either metal or plastic caps). When installing flashing, you can simply opt for the same nails for the shingles, as they don't require any special properties. For flashing and sheathing, standard roof nails will do the trick.
Hand-Driven Nailing vs. Pneumatic Nailer
You will need to decide whether to hand-drive the nails with a hammer or use a pneumatic nailer.
Using the pneumatic nailer is a much faster solution than hammering manually. Many shingles come with warranties that require you to install at least four nails per shingle, with some of them needing up to six (required in the Coastal Bend). As well as time considerations, using a pneumatic nailer is obviously significantly less physically demanding than manual hammering.
That said, an upside of using a hammer is that you have better overall control over nail placement. You can ensure a nail is tightly fitted and properly penetrates the decking, which can help in the long term as issues may arise if a nail is over- or under-driven. When nails are over-driven—meaning they go well past the material below it—it can cause openings in the shingles which can lower wind resistance (among other issues). When under-driven, nails don't fully penetrate the decking, which can lead to loose or falling shingles and leaks over time.
Size and Length of Roofing Nails
Typically, a roofing nail measures anywhere from 1 to 2 inches. A roofing nail should be long enough to penetrate the shingle and then the plywood or OSB decking beneath by at least 3/4 of an inch. The sheathing thickness can vary, so you may need longer nails depending on the decking used.
Keep in mind that some parts of the roof—like hip and ridge cap shingles, and ventilation accessories such as a ridge vent—require longer nails. Some premium or designer shingles may also require longer nails than standard 3-tab shingles, as they tend to be thicker (usually consisting of two shingle strips fused together).
Another thing to note is that 3/4-inch or 7/8-inch nails may be used at open soffit areas so as to not completely penetrate the decking. Completely penetrating the decking can cause the material underneath—most often finished wood—to splinter as well as the nail to be visible from the ground.
Most manufacturers recommend using zinc-coated steel or aluminum, 10-12 gauge, barbed, deformed, or smooth shank roofing nails with heads 3/8" (10mm) to 7/16" (12mm) in diameter. Fasteners should be long enough to penetrate at least 3/4" (19mm) into wood decks or just through the plywood decks. Fasteners must be driven flush with the surface of the shingle. Over-driving will damage the shingle. Raised fasteners will interfere with the sealing of the shingles and can back out.
Remember to always ask your roofing contractor what type and how many nails per shingle they are planning to use on your project when getting estimates. In coastal areas like ours, we highly recommend that hot-dipped galvanized are used and 6 nails per shingle are required. Upon delivery of your materials, ask for photos of the nails if the delivery company put the materials on your roof or check on the side of the box to make sure you get what you pay for. While nails might seem like a small detail, the type, size, and how many are used per shingle is very important to know before you start your roofing project. If you have any questions or would like to get an estimate for your upcoming project, feel free to set up a no-pressure roofing consultation today!
Lighthouse Roofing
361-657-0091
www.lighthouseroofingcompany.com